

Hi, guys so I decided to try out a new curling technique on my hair. I love how it came out and how long it lasted! Above are pictures of day 1 & 2 of the curls it actually was still curly into day 3 but I was out of town and forgot to take a picture. By day 4 it was still really pretty but most of the curls and slipped into waves. It's super easy and really cheap (which is always great). My Aunt thought that I had gotten a perm when I posted pictures to my Facebook. Ready to try?
You will need:
Spray bottle with water in it
Towel (to keep water off of the floor)
Flexible straws (Yes you read that right. We got ours at Dollar Tree for a $1)

Step 1: Dampen hair (you don't want it soaked like you just stepped out of the shower just damp)

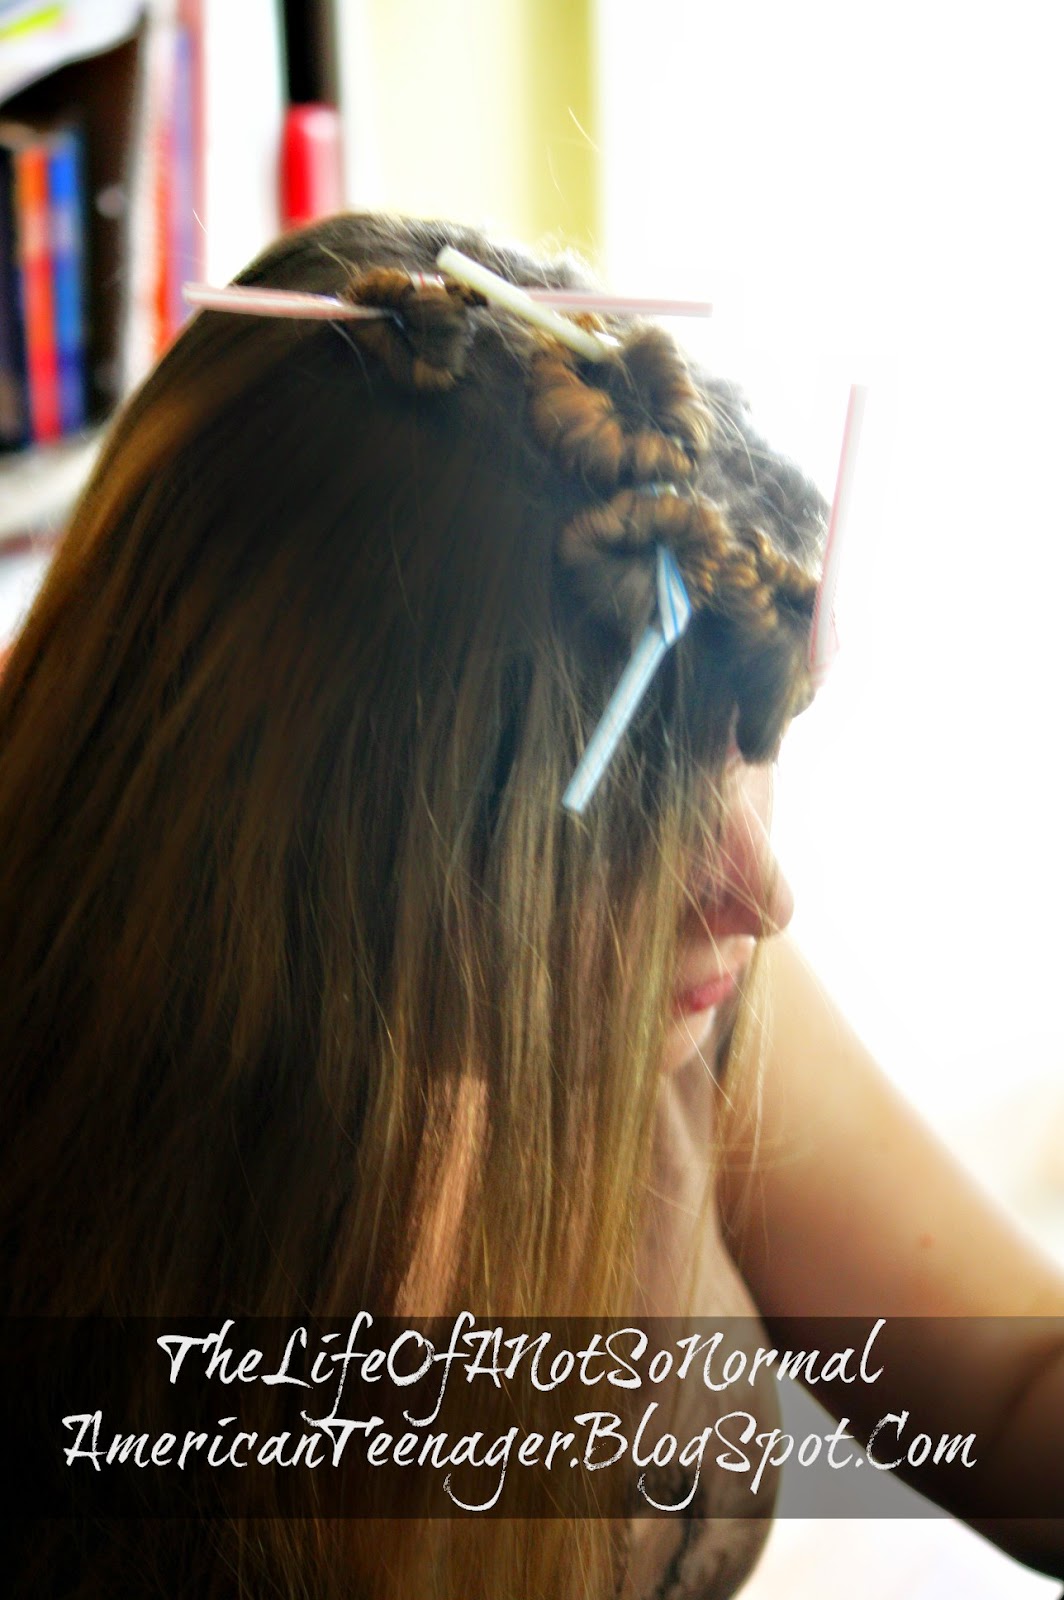
Step 2: Take a straw and begin wrapping a piece of hair around it (for thinner hair you may want to take thicker pieces. If you have pretty thick hair you probably want to take thinner pieces so you can get it all on one straw).
Continue wrapping until you reach the end of the piece of hair.


It should look something like this.


Step 3: Tie the ends of the straw together in the beginning of a knot (DO NOT FINISH THE KNOT) and move on to the next repeating steps 1 - 3

Continue until all of your hair is wrapped around straws. You can either leave them in for several hours while allowing the curls to air dry, or you can use a hair drier. Or you can sleep in them and take them out in the morning. Whatever you have time for. And that's it! You use a headband to pull it out of your face like I did or a clip would work too!

We took larger pieces this time and the curls came out looser and not as tight. (Thanks, Mom and Sis for helping me out!)
Love this look on you!! Adorable!!!
ReplyDeleteLove the curls!
ReplyDelete